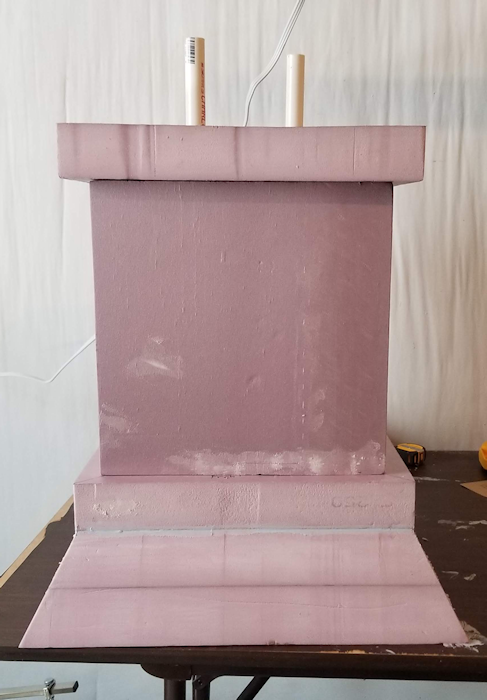
Obelisk base, test fit with PVC to check alignmentI’ve made a good amount of progress on the base of the obelisk. I got the cube assembled and then test fit it with the PVC pipe that will run up the core of the obelisk and, after a few adjustments, it all fit well enough that I’ll be able to make it work. I’m still not sure if I’ll be able to disassemble the obelisk into two parts like I originally hoped, but after test fitting the base, it’s at least plausible.
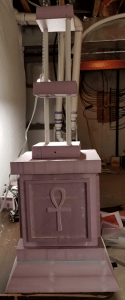
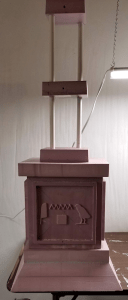
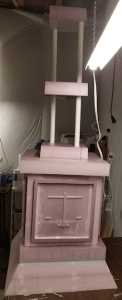
After the test fit, I sanded the surface nice and smooth, then attached the artistic details. You can see the left, front, and right sides of the obelisk (as you’re looking at it) in the gallery below. The ankh is because nearly every painting of Anpu, aka Anubis, I’ve seen has Anpu holding an ankh in one hand. The hieroglyphs are literally “Anpu” in Egyptian, and the scale is because Anpu would weigh the heart of the dead against a single feather and, if the heart was heavier, the soul of the dead would be devoured. And the three pieces of foam at various points on the pipe is where the base and the two internal braces for the obelisk stone will be placed.
Left of obelisk base with details, test fit of stone internal bracing with correct PVC
Front of obelisk base with details, test fit of stone internal bracing with correct PVC
Right of obelisk base with details, test fit of stone internal bracing with correct PVC
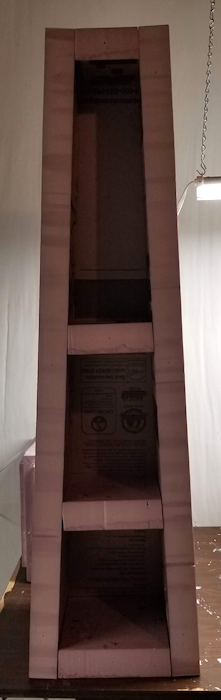
Obelisk stone test fit of front, left, and right sides, pinned onlyAnd finally, the last photo is the left and right sides plus the front of the obelisk stone (minus the pyramidal cap) after they’ve all been pinned. It’s clearly not straight, but that’s OK for the moment as that wasn’t the point. Now all I need is enough time to glue it and enough clamps to hold everything stable while the glue dries. And then to glue the back on. Patch it, sand it, texture it, “age” it, paint it, age it again, and assemble it. And maybe figure out how to light it with a red electroluminescent wire I have, along with adding other cool details.

Leave a comment